Wednesday, April 30, 2014

Very Sketchy Scrapbook April S&S Challenge

And another challenge I was able to get done.  Maybe next month I will try to get these projects done quicker.  We will see...

The Smeared and Smudged Forum challenges are great for inspiration and making you try something that you not want to.  This scrapbook sketch for the Very Sketchy April challenge was a bit daunting.  There was a lot going on and was able to get the base done.  Until this past week I finally decided what I wanted to place on the page.

The first picture is the inspiration from the April Sketch.  The second picture is what the finished page looks like.


Quoth the Raven, Nevermore #31 and Oh! The Horror S&S Challenges

Quoth The Raven, Nevermore Challenge #31 is POEcabulary.  Use any works by Poe that will inspire your piece.

I have combined this challenge with another challenge over at the Smeared and Smudged Forum.

Oh! The Horror Challenge is this month is the 1961 movie The Pit and the Pendulum.  A movie based off the work by Edgar Allen Poe.

I have made a page that is inspired by both the movie and the short story.  Just the love that sense of madness as the pendulum gets closer and closer.


Spiraling out of Control Details

Papers are from stash.
Used inks and Aqua Painter for flames.
Marker to make the stone wall, hand done.
Rats from set Piece of Poison (retired SU!).
Markers to hand draw pendulum.
Eyes are part of a stamp from Lost Coast Designs.
Candles are stamped with Gold Encore ink and from set Nevermore by Inkadinkado.
Tore and crumples hooded shapes from Basic Black card stock.
Used Melted Chocolate Dylusions Ink Spray along all edges.
All materials used are current Stampin' Up! unless otherwise noted.

Smeared and Smudged Very Sketchy and Dilly Beans April Challenges

Get ready for a lot of posts because I had some time this morning to get some projects finished up.  It is also the end of the month for the challenges over at Smeared and Smudged Forum so there will a couple more posted today.

The card sketch for the April Very Sketchy challenge was a great way to use some scraps to layer.  You
have until the end of today to get those projects in.  Then a fresh start in May.  The Smeared and Smudged Forum is a great place to open up and let your dark side shine. 

I am also entering this card into the Dilly Beans Designers & Friday Challenge.  For this round the theme is Halloween in April.  Remember you must now use a Dilly Beans image to enter into their challenges.  I have used Framed Friday with Skull.  You can find more images at Dilly Beans Stamps.

Only 6 more months to go til' Halloween is here!!  But as you know I tend to celebrate year round.  So, wishing you all an early Halloween.

Happy Deets

Dilly Beans Stamps image is printed onto Neenah paper and coloring is a combinations of markers and Copic markers.

I used Smooch Pearl Accents on the eyes and skull.

Papers from stash.

Stamps are Tenticurl by Jo Capper-Sandon and saying from Smeared Ink Rubber Club set Creepy Lil' Grumpies.

Candy dots for embellies.
All materials used are current Stampin' Up! unless otherwise noted.

Tuesday, April 29, 2014

Ike's World Challenges DT Project AND HDH #187

This new Challenge #16 here at Ike's World Challenges is THINGS WITH WINGS.
Ike has some wonderful images at her shop, Ike's Art, and for this challenge I have used three.  Please join the fun for the next two weeks with your wonderful project that features anything with wings.  Please note that you must use an image by Ike to be able to have a chance at the great prize.

Our Design Team here at Ike's World Challenges have been working hard to give you some great inspiration.  Please be sure to check back in one week to see the completed works of the entire Design Team.  Thank you for your support and hope to see your entry soon!

I am also going to be entering this page at Haunted Design House Macabre Monday Challenges for their #187 Challenge - Working in the lab, late one night.

Art Journal page using Ike's Art images:
Cognitive Thoughts, Winter Robin, and Cushion Kitty (a previous IWC freebie)


"It was an ill work I did that night when you were present, I broke open the door of the house of life, without knowing or caring what might pass forth or enter in."  Dr. Matheson, The Great God Pan by Arthur Machen.

Patchy Deets

Images are printed out and fussy cut.
Blue thread to make head look like sewn on.
Feet and left eye from Cushion Kitty image.
Smooch Pearlized Accent Inks for metallic sheen.
Inks, markers, spray inks, borrowed stencil, Mini Gears Stencil (The Crafters Workshop), Aqua Painter, and sponges used.
Fine tip black Sharpie for words.
All materials used are current Stampin' Up! unless otherwise noted.

Monday, April 28, 2014

Smeared Ink DT April Blog Hop

Yes, it is the last Monday of the month of April and we are at it again with the monthly 
Smeared Ink Design Team Blog Hop.  

BLOG ROLL
Shoni / Crafty Inknik - YOU ARE HERE
Theme this month is DO YOUR OWN THING.

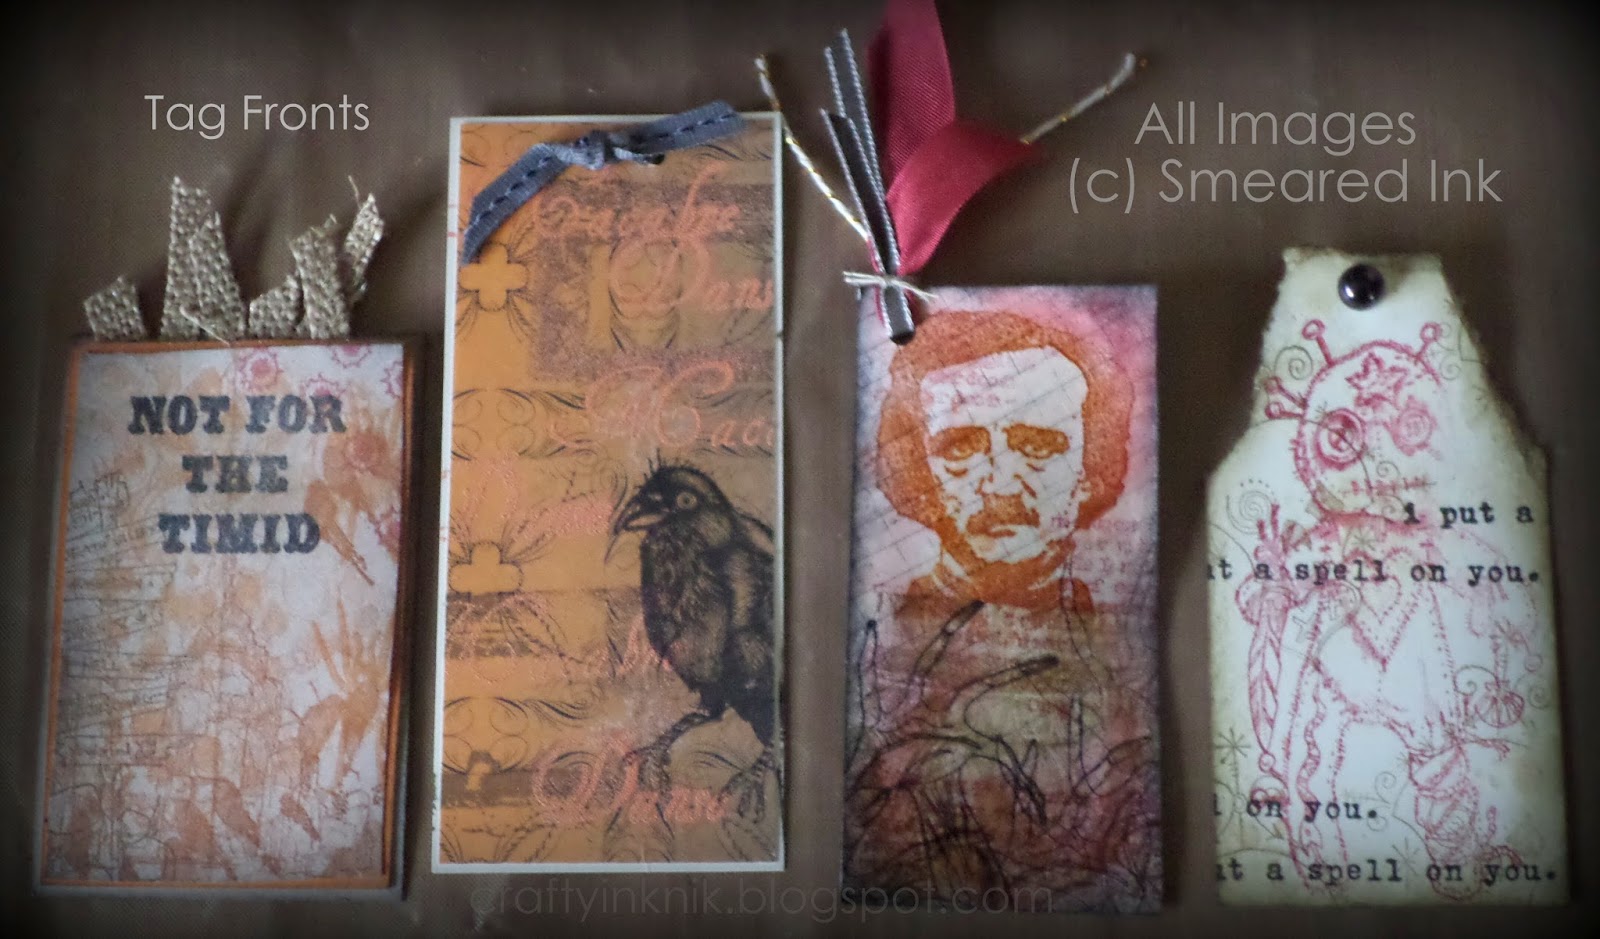
I have made a Tag book to show off Smeared Ink's rubber stamps.  Check out the Smeared Ink Rubber Club for more information on how to get your crafty hands on these wonderful sets.  There are 8 pages and each have pockets to hold tags.  In the folding of this, there are also 2 extra pockets that are in between pages.  A total of 10 tags have been completed for this project.

There are a lot of pictures for this project so I will not keep you reading long.  That will be saved for after the picts.  You all know how much I like the deets!  Enjoy and happy hopping.


Hello again!  
I wanted to keep the front and back pretty plain since there is so much going on in the inside.  I was going to try to stick to one stamp set, but as the theme was, Do Your Own Thing. So, I tried to use as many stamps from as many sets as I possibly could.  
I love to layer and had so much fun mixing and matching sets.

I am going to give the gist of the deets and then the supplies and stamp sets listed below.
Thanks again for hopping and hope this was some inspiration for you for the week.  Now, go get crafty!

Taggin' and Deetin'

BOOK
Book was scored and cut from one single sheet of 12" x 12" piece of Designer Paper from set Pick Your Poison (retired SU!).  Book measures 4" x 3 1/4".
Sticky Strips was used to help adhere pages and back binding.  Backing is also from the same DP set.
I used the Scallop Trim Edge Punch and adhered the ribbon before adding the backing onto the book.
Black dots were made using a black Sharpie.
Ribbon is:  1/8" Basic Black Taffeta Ribbon, Linen Thread, Black Hemp Twine, and Silver Baker's Twine.
Extra strips of DP, from same set, was also used to highlight pockets.

TAGS
Tags are all DP, from Pick Your Poison set.  Very Vanilla, Basic Black, Pumpkin Pie, Soft Suede, and Crumb Cake are card stocks used.

Punches used are:  Scallop Trim Edge, Scallop Tag Topper, Curly Label, Corner Rounder, 1 1/16" Circle, and Horizontal Slot.

Ribbon is:  Silver Baker's Twine, Gold Baker's Twine, 1 /8" Basic Black and Early EspressoTaffeta, Crochet Trim, Very Vanilla and Cherry Cobbler Seam Binding, 1/4" Early Espresso Grosgrain (retired), Basic Gray 1/4" Stitched, Linen Thread, and Burlap.

Accessories are:  Large Pearl Jewels, Silver and Gold Smooch Spritz, Sponges, Versa Mark ink, Black StazOn, SU! inks, heat gun, stapler, and Crystal Effects.

Embossing Powders:  Smoky Gray, Pewter, Cherry Cobbler, Tangerine Tango, and Clear.

As Death (Oct 2012)                                               
Femdom (Jan 2013)
Quoth The Raven (Feb 2013)
Prints (Mar 2013)
Urban Decay (April 2013)
Holy City (May 2013)
Morte (Jun 2013)
Holy City 2 (July 2013)
Voodoo (Aug 2013)
Creepy Lil' Grumpies (Aug set #2, 2013)
Haunted Places #1 (Sept 2013)
Haunted Places #2 (Sept 2013)
Inky Dreams (Oct 2013)
Chicks Dig Guns (Nov 2013)
Carnies (Dec 2013)
Dedicated to Art (Dec 2013)
Danse Macabre (Jan 2014)
Killer Bo Peep Build-A-Garden (March 2014)
Build A Zombie Alphabet (March 2014)
  
All materials used are current Stampin' Up! unless otherwise noted.

Wednesday, April 23, 2014

Smeared Ink Weekly DT Project and Left of Center Challenge #29

I knew I wanted to try something fun with the set Morbidly Adorable Tarot: Set 1 (Jan 2014), a Rubber Club Past Offering from the Smeared Ink Rubber Club.  This set has amazing art work done by the fab-o Misty Benson.  Her skellies and art work, WOW!

Left of Center Creative Challenges blog has an Anything Goes Dark Theme #29 so get those projects finished up and enter to win some fun prizes.  And you must see what inspiration the DT has come up with, KILLER!

For my Weekly Smeared Ink Design Team project I have created a kind of a Stained Glass Window Hang.  Not sure really what to call it so there you go.  Figured that my Smeared Ink image was pretty dark when you have skellies playing music in the rain! 

Here is a better picture of the frame:

Sheets of Deets

Main Image
I am a huge fan of Splitcoast Stampers and just amazed at all of the tutorials that they have collected over the years.  I have used a tutorial called Acetate & Tissue, by Beate Johns, that was one of the first tutorials I had ever done and one of my favorite techniques.

So for the main image you stamp your image with Black StazOn onto a piece of acetate.
Let image dry.  Turn over.
Place drops of re-inker, using whatever colors you would like for your image.
Squeeze Crystal Effects all over.  
I use my fingers, but you can use a gloves, to smear CE to cover and get colors over entire image.
At this point you can add glitter, which I did, but not too much or your tissue paper will not stick very well.
Place white tissue paper (this is not kleenex or toilet paper) over entire image.
Press down to adhere tissue paper to acetate.  Be sure to squeeze just a tad more CE over back or your fingers could dry out and tear tissue paper.
Let dry and trim off excess tissue paper around edges.

Frame
Cut 1 1/4" strips from heavy cardboard from stash.  Used Sticky Strip and made a frame.
Placed Cherry Cobbler ink all over frame.
Used Tombow glue over entire frame, then laid down straw material in strips all over frame.
Poured more glue to help hold down strips.
Used a heat gun to make the glue try quicker.

Mixed some black Gesso with water and used a paintbrush to cover frame and material.  Heat gun again to dry quicker.

Used Dylusions Spray Inks (Lemon Zest & After Midnight) and SU! Smooch Spritz (Pink Pirouette, Gold, and my own mixture with Vanilla Shimmer).
Cherry Cobbler Dazzling Details to add small bits of glitter on frame.

Black Linen thread for hang.  
Black card stock for backing.
All materials used are current Stampin' Up! unless otherwise noted.

Thursday, April 17, 2014

Smeared Ink New Release Design Team Blog Hop


BLOG ROLL

Shoni / Crafty Inknik - YOU ARE HERE

Welcome Everyone!
I hope that you are enjoying the Smeared Ink New Release of the digital images from I Loved Alone.  You may have just been at Kapree's blog and up next is Creepy Glowbugg.

We have some new Design Team members that have recently join the Smeared Ink team.  
Congrats Creepy Glowbugg, Lisa, Elenor, and Rebecca!
Stop by the Smeared and Smudged Forum to see weekly projects from our killer
Smeared Ink Design Team.

Please enjoy the rest of the Blog Hop and have a fab-u-lous day.

ATC's and ATC Holder

 Back of Holder

 Center ATC Close Up

Down Under the Deets

ATC's

The ATC's are each printed out onto Whisper White card stock.
Each has a bit of fussy cut or torn edges. 
Each was colored in with color pencils, markers, inks, Blender Pen and Aqua Painter.

Base of each ATC is different colors of blue card stock.
On the upper right and lower left ATC's there is an extra layer of backgrounds that were made with acrylic paints and home made gelli plate.

Smeared Ink Rubber Club stamps used were from sets:
Dedicated to Art (Dec 2013)
Danse Macabre (Jan 2014)
Nymphs (Feb 2014)
Each of these sets can be viewed in the Rubber Club Past Offerings area.

Close up of Center ATC shows the Ranger Distress Crackle Paint, Clear Rock Candy, which is
covering each ATC.
A circle template was also used for this center background with sponge and ink.

Top right and lower left ATC's have punched chain card stock.  Punch is by EK.

ATC Holder
Found a wonderful tutorial on Tuts and Comments, a Rick St. Dennis EDT blog, by an awesome person so named Lady Brayton that I used to make this holder.
I followed all instruction and found HERE.
Early Espresso Core'dnation card stock for my holder base.
I used SU! retired DP for my 12 pockets.

Outside of Holder
Decorative Dots Embossing Folder and Big Shot for texture
Sanded raised area.  Added Island Indigo ink on raised/sanded areas.
Versa Mark ink for saying and texture stamp.
Used Pool Party EP on saying and Early Espresso EP on wavy stamp.  Heat set.
Inked entire back with Versa Mark ink.  Covered with Clear EP and heat set.


Riboon is Midnight Muse Stitched.
Velcro dots from stash.
Scallop Trim Edge Punch along bottom edge of top flap.
  All materials used are current Stampin' Up! unless otherwise noted.

Tuesday, April 15, 2014

Ike's World Challenges DT Project for Challenge #15

Ike's World Challenges is now open for entries for a new 2 week challenge.  Challenge #15 is Tickled Pink.  Use this fun theme and the inspiration from this weeks Design Team Members to help you get started on your entry.  Remember to check back next week for fresh inspiration from the rest of our wonderful Design Team here at Ike's World Challenges.

Don't forget to download your free image so that you can be entered to win a prize at the end of the challenge.  We enter and vote on all projects with Ike's images for the winner.  You can use images from either Ike's Art, the freebies offered, and even from other shops whom Ike designs for - Just as long as it is an image designed by Ike.  We welcome all projects and enjoy seeing what is created in each challenge.

I am a freak for notebooks and enjoy making them.  I realized that it has been a while and so decided to make a fun notebook that definitely tickled me pink.

Solely the Deets

This shoe is one of four from Ike's Art called SHOES - set of 4
Image is printed out onto Whisper White card stock.  Blender pen and markers to color in.
Fussy cut and adhered to Basic Black card stock.
Crystal Effects over entire shoe image.  Glitter only on pink shoe base.

Front and Back Covers
Both are Basic Black card stock.
Ripped Fishnet stamp by Visual Image inked with Versa Mark and stamped.  Clear Embossing Powder over stamped images and then heat set. This was repeated for front and back of each piece of card stock.
Placed fussy cut shoe image in center and cut around.  Repeated for back cover.

Inside Pages
Placed fussy cut shoe on a stack of printer paper and traced.
Cut along traced line slightly smaller so that papers would fit inside of covers.
Used Melon Mambo marker to write words.

Layered covers and pages so that they where lined up to punch hole for black ring with Crop-a-dile.
Large Tag Punch (retired SU!) from shoe cover scrap.
Small Tag Punch (retired SU!) from scrap printer paper.
Same marker to write note.

Black ring is from stash.
Ribbons are:  Calypso Coral Bakers Twine, Basic Gray Stitched Grosgrain, Whisper White Taffeta, Primrose Petal Stitched Satin, Basic Black 1/8" Taffeta Ribbon.
 All materials used are current Stampin' Up! unless otherwise noted.

Monday, April 14, 2014

Freaky Freebie April 2014 Challenge on S&S

Yes, it is the middle of April and I am finally getting a chance to play at my favorite Smeared and Smudged Forum challenges.

This is a free forum that caters to those of us who are not quite so cute in all of our creativity.  Every month you can grab a Smeared Ink free digital image on the Freaky Freebie monthly challenge!  This month we have a great image called Spanking from the Femdom set which is only available through the Smeared Ink Rubber Club.
  
Made a little card for those pesky roomies who do not respect your favorite pieces of clothing.


Torn and Tattered Deets

Printed out Spanking image onto Whisper White card stock.
Colored image in with inks and Blender Pen.
Fussy cut and adhered.

Background is Ripped Fishnet from Visible Image.  Used Melon Mambo ink.
Randomly sponged Crisp Cantaloupe ink.

Words are written with fine tip black Sharpie.
 All materials used are current Stampin' Up! unless otherwise noted.

QTR,N #31, DominoART #10, Challenges & Smeared Ink Weekly DT Project

Been seeing tons of great challenges out there and had to make something.  I decided on a little hang.
Just received my recent Smeared Ink Rubber Club stamp set Specimen Jar and HAD to use!  Stamped images are from this set and Quoth The Raven (Feb 2013), a Rubber Club Past Offering.  For my Smeared Ink Weekly Design Team project, Smeared Ink rubber are the only one's I have used for this project.
I have never joined DominoART and have been intimidated by the wonderful projects that are shown and all the talent of the entrants as well.  So I sucked it up and decided that I am gonna give it a shot this round.
Then, I apologize to the Master, but for some reason keep missing the deadlines for the Quests at Quoth The Raven, Nevermore.  Will take my lashing and not miss this round!!

Quoth The Raven, Nevermore Challenge #31 is POEcabulary.  Use any works by Poe that will inspire your piece.  I have chosen a short story called Berenice by Edgar Allan Poe, published in 1835.  I have used quotes from the story and you will have to read it to find out the true horror...

DominoART Challenge #10 is Any Game Goes Using Stencils.  I love stencils and I think I used 4 different stencils in my backgrounds on my game pieces.


Pullin' Out the Details, One by One

Started out with a Super Hero Memory game.  Had 3 cardboard cards that had lost their partners.  Used White Gesso on each side.
First layer of ink was a Dylusions Melted Chocolate Ink Spray.
Sponged Early Espresso ink around all edges and sides.
With sponge and ink used Ring Dolly stencil from The Crafters Workshop.
Next, a Dreamweaver Stencil called Frame.  Again with sponge and ink.
I inked up Mini Gears stencil with Gold Encore ink.  Layed my piece onto inked stencil and pressed down to get the stencil image.
Last, was the Mexican Skull Stencil, from The Crafters Workshop, with sponge and ink.  I used the flora around the main image.
Each stencil was used on each side of the 3 game pieces.

I chose three different butterflies from the Smeared Ink Specimen Jar set (March 2014 #1).  Each was inked with Black StazOn and stamped onto blue tissue paper.  Each was fussy cut and adhere to center of game pieces with Crystal Effects.
On center game piece I used Versa Mark ink and stamp from Smeared Ink Quoth The Raven set (Feb 2013).  Image was stamped onto dried surface.  White Embossing Powder over stamped image and then heat set.

On the back sides of each piece I will start from the top down.
Top Piece - Quotes from Berenice by Edgar Allan Poe.
"She spoke no word..."
"The eyes were lifeless..."
"...the teeth of the changed Berenice..."
All written with fine tip black Sharpie.

Middle Piece - Stamp lady image from Specimen Jar with Black StazOn.
Teeth from stamp out of Quoth The Raven set with Versa Mark ink and heat set with White Embossing Powder.
Words written with fine tip black Sharpie - "...Berenice of dream."

Bottom Piece - Black Sharpie used to write "THE TEETH".

All sides of each game piece was Versa Marked and heat embossed with Clear Embossing Powder.

Teeth are made from White Simply Pressed Clay.  Dried and colored in with Aqua Painter and inks.
Adhered with dyed white tissue paper and Crystal Effects.

Fishing line to hold pieces together and for loop at top.
Skull at top is from stash.
All materials used are current Stampin' Up! unless otherwise noted.

Sunday, April 13, 2014

Weekly Smeared Ink DT Project

Feels great to be home and can't wait to get back to crafting.  We are just finishing up Spring Break here and the kids and I were gone all week.  Had a great time with both sets of grandparents and took all three kiddos on a backpacking trip in Moab, UT.   So between laundry and unpacking the car my breaks are trying to get some posts and online eye candy in.  So much to catch up on!

On to my Smeared Ink Weekly Design Team Project.  I have created a recipe box out of necessity.  I have one notebook where I place my fav's, but it got left behind at a friend house, eeekkkk!  So now I have decided to create a new box to place my fav's and it WILL NOT leave my house.  Remember to check out the Smeared and Smudged Forum for my teamies wonderful weekly projects, or click on their names on the left side to get to their blogs.

I was in Santa Fe, NM a couple of weekends ago and found a fabulous little stamp shop in downtown.  Picked up a couple of "must have's" and the stencil used on the front and back of my box is one of those.

I have used Smeared Ink Rubber Club stamps from the Past Offerings Rubber Club and am waiting to get my Build A Zombie Alphabet, which is one of two of April's Featured Sets, for the letters to spell "Recipes" and other fun words dealing with food and eating.
My pages are stamped, stenciled, and printed out.


Appetizing Deets

I started with a Tampax box.  Tore off the top flaps.  Adhered Newsprint Designer Paper (retired SU!) all over the box with Tombow glue.  Set aside to dry.

Danse Macabre from Past Rubber Club Offerings used on side and on pages.  (Set is also availabe in Digi HERE)
Blue skull page is from the Smeared Ink Digital Paper set Cranium.  Color is altered and printed out in a smaller size.

Finished my box with Black Gesso around all edges to help cove the color the original box and to hold a all the torn pieces in place.

Once everything is in place, the words, I will go over each panel with Crystal Effects to give a shiny finish and to hold it all together.

Photo 1
Once dry, I placed Mexican Skull stencil, from The Crafters Workshop, directly onto box side.  Spritzed with Dylusions Ink Sprays.  Placed a piece of white card stock over top to get the negative, which will be used on the other side of box.

Inked my homemade gelli plate up and you can see the acrylic paints and images around the edges.  Used another stencil called Ring Dolly, also from The Crafters Workshop, along the left edge with sponges and ink.

Pearl Jewels for eyes colored in with black Sharpie.  Fine Tip black Sharpie to outline the stencil a bit to see more of the skull image.

Photo 2
Used the negative from the first side.  Tore edges and adhered to side.
Ring Dolly Stencil used once more along once side with sponge and ink.
Pearl Jewels for eyes.

Photo 3 - Box Inside
Cut up a 12"x 12" DP from My Minds Eye and then spritzed with Maya Red Spray. 
Placed a stronger piece of cardboard in the bottom which was distressed with Early Espresso ink around edges.
Used Lace Ribbon Border Punch (retired SU!) for edging with scrap DP.  Adhered to front and back edges.
Placed brads on each bottom corners, and on front and back of box.
Spritzed DP then adhered over to make a nice clean finish for box inside.

Side Panel
Rubber stamp from set Danse Macabre (January 2014) on torn Whisper White card stock.
Whisper White card stock background from gelli plate scraps.
All materials used are current Stampin' Up! unless otherwise noted.

Tuesday, April 1, 2014

Ike's World Challenges #14 - Everything Easter

Are you ready for a fun new two week challenge theme at Ike's World Challenges?  I hope you can join because it is all and Everything Easter!  Challenge #14 starts for two weeks and see what the Design Team has come up with.  Remember to check back in a week for more inspiration from the rest of the fabulous team members we have at Ike's World Challenges.

Ike usually gives you a freebie each challenge so that you can participate to win a prize!  An Ike's Art image must be used in order for your project to qualify for the prize.  But know, that all entries are welcomed and we love to see your creativity!

 I have made an Art Journal page using an Ike's Art image called HONEY.  I think is it so fun coloring and making hard boiled eggs with the kids.  Then, what do you do with them all???  I love this image because the look on Honey's face is one I seem to have every year...

Hey, I'm all for Easter, but after making 200 deviled eggs...I AM DONE!
Boiled Deets
Black Gesso and a White Signo pen for my background.
White card stock for base of Honey and acrylic inks on homemade gelli plate.
Black Sharpie for saying and broken egg shells on side.
Honey from Ike's Art printed and colored in with inks and Blender Pen.
She is fussy cut and adhered.l
Crystal Effects on lacy parts of outfit and cleaver.  
All materials used are current Stampin' Up! unless otherwise noted.